Easy No Knead Bread Recipe
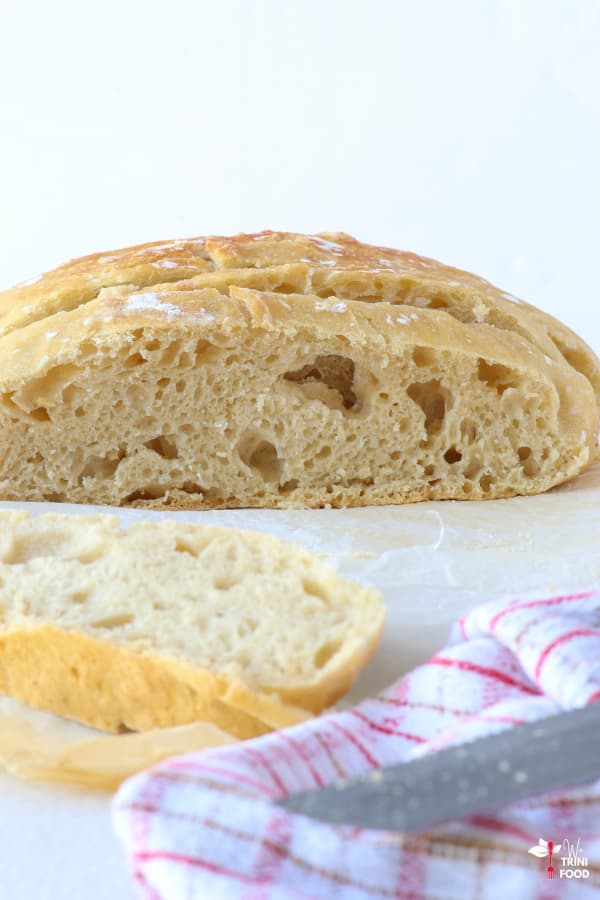
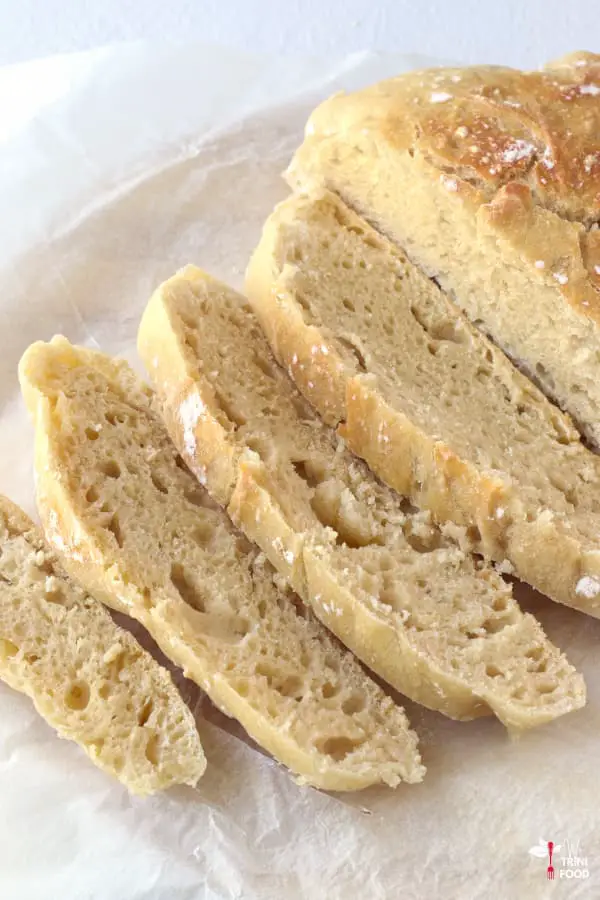
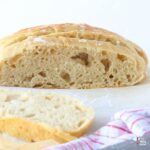
This no knead bread recipe is so forgiving, simple and gives you a beautiful artisan bread with a wonderful taste, crispy top crust and large holes like a sourdough.
To make this bread, simply mix the four ingredients together, cover and set aside overnight (12 hours) to proof before shaping the dough and leaving for another 2 hours. Then, bake in a preheated cast iron dutch oven at 450°F for 30 minutes or so.
This post contains affiliate links.
Ingredients for this no knead bread
For this recipe, I used:
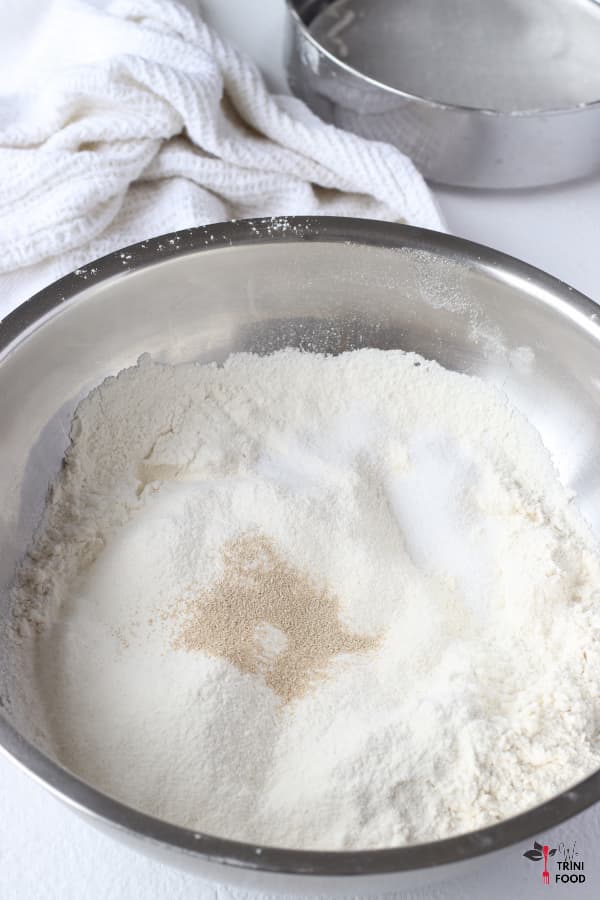
- flour: I used all purpose flour here that I sifted to make it easier to mix and combine. You can try bread flour as well.
- yeast
- salt
- water
Equipment for this recipe
A cast iron or enamel dutch oven with a cover is needed for making this homemade bread. Also, if you don’t want to get your hands dirty, a dough scraper or silicone spatula will also help when handling the dough.
How to make this no knead bread recipe
Form the dough
Step 1: In a large bowl, sift the all purpose flour. Add the yeast and salt and mix to combine fully.
Step 2: Add the water to the dough. If you add a quarter cup of water at a time you may need more water to bring the dough together (about 1 3/4 cups of water). But, if you add the water in one go, you’ll only need about 1 1/2 cups. This dough is very forgiving so a little extra moisture won’t affect the bread in any way.
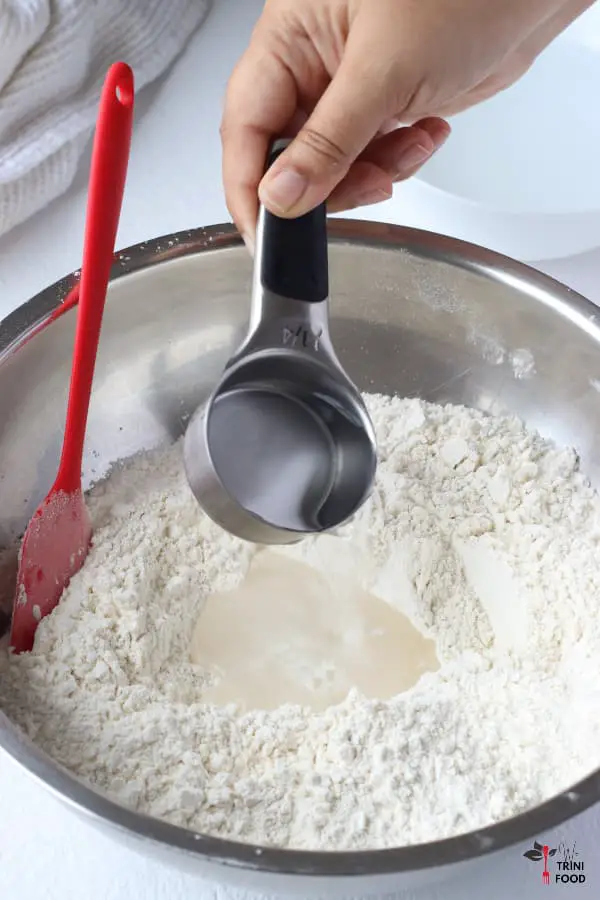
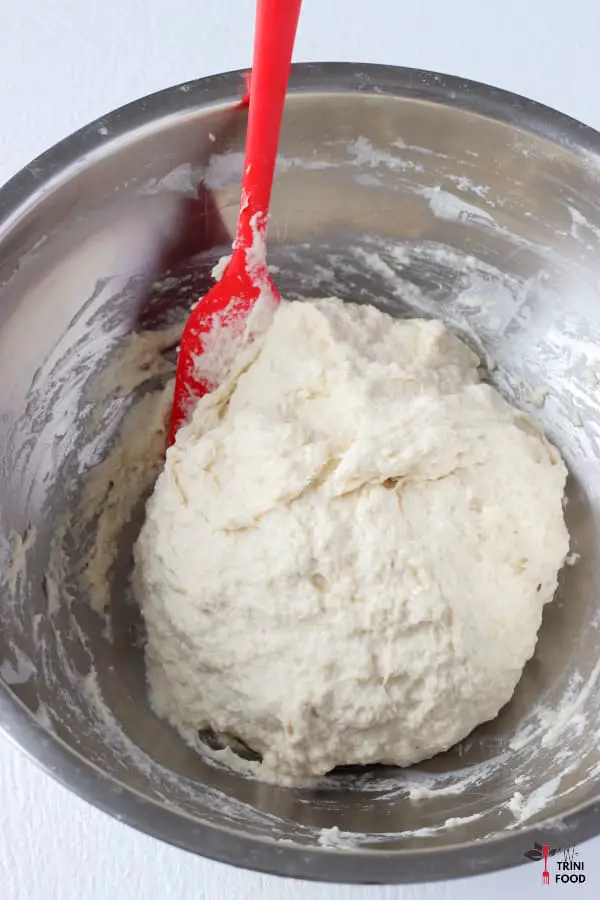
Step 3: Stir to incorporate the water and form a sticky dough.
Allow to proof
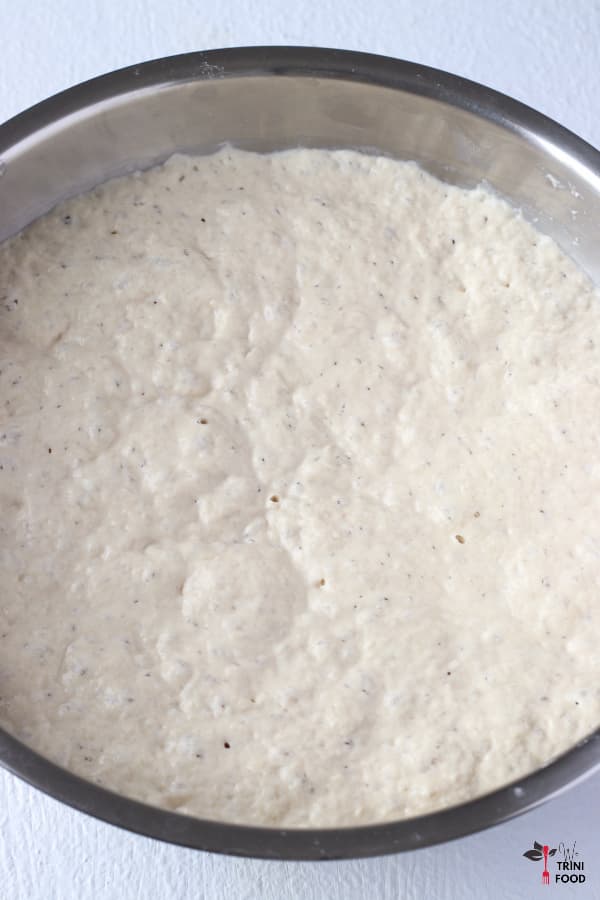
Step 4: Cover with plastic and leave on the countertop, at room temperature, overnight to proof – anywhere from 6 hours to 18 hours is perfect. Here, I left the dough for 12 hours.
Step 5: After the proofing time, remove the cover. It should be very wet and sticky.
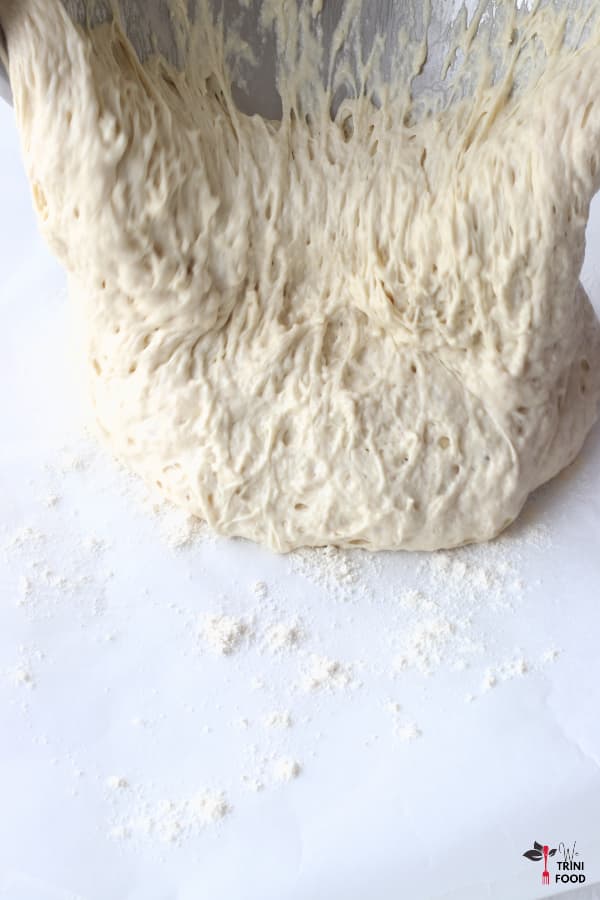
Step 6: Tear two sheets of baking or parchment paper large enough to fit into your dutch oven with the sides sticking upward. Sprinkle liberal amounts of flour onto the paper.
Step 7: Turn the dough over onto the floured paper. Dust more flour onto the top of the dough.
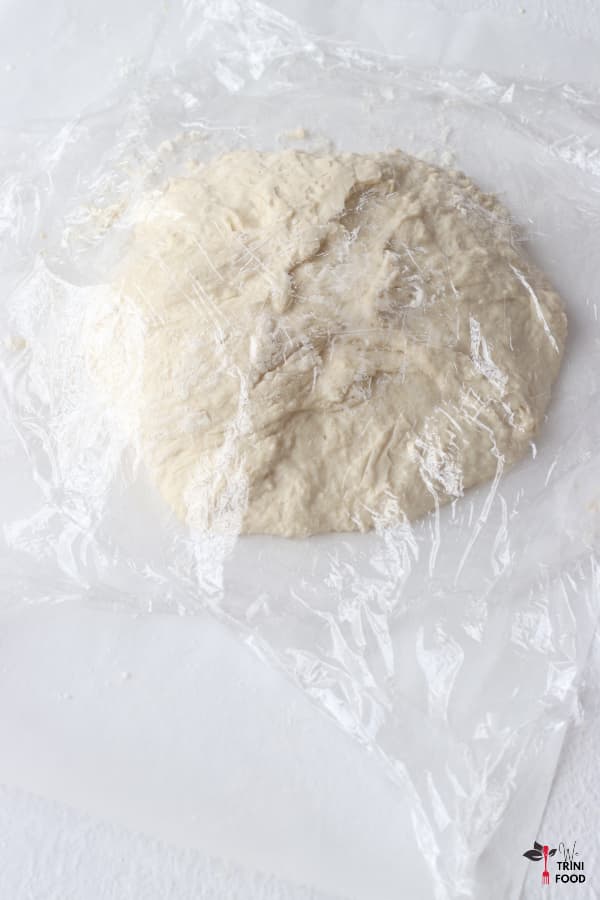
Step 8: Dip your dough scraper, silicone spatula or even your fingertips in a little water or flour. Gently pull one side of the dough over to the other side. Repeat one to two more times on other sides of the dough. These folds help to shape the dough so it fits into the dutch oven.

Step 9: Cover the dough with plastic and leave to raise for 2 hours.
Bake
Step 10: An hour and 15 minutes into the proofing time, preheat your oven at 450°F. Add the dutch oven with its cover to the preheating oven to heat up. The hotter the dutch oven becomes, the quicker the bread will cook.
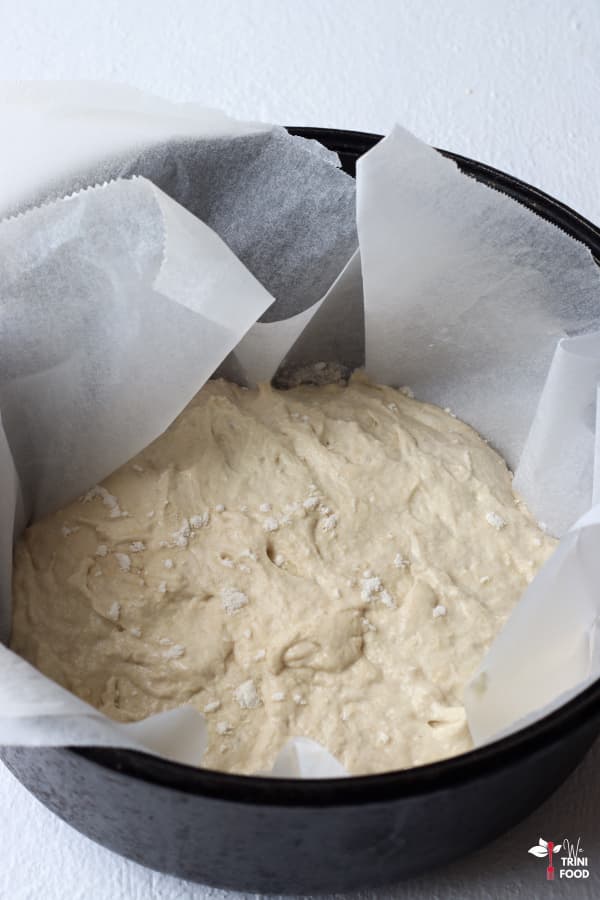
Step 11: Once the proofing time for the dough is over, remove the pot from the oven. Use heat resistant oven mitts since the pot is both very hot and heavy. Be careful!
Step 12: Remove the cover. Carefully lift the edges of the parchment sheets with the dough on it. Keep the edges far apart from each other so the dough doesn’t become squished in the center. Lower the paper into the preheated dutch oven.
Step 13: Place the cover back on. Return the dutch oven to the oven.
Step 13: Bake for 20 minutes covered.
Step 14: Remove the cover (carefully!).
Step 15: Bake uncovered for another 10 minutes or until the top of the bread develops a wonderful, golden color.
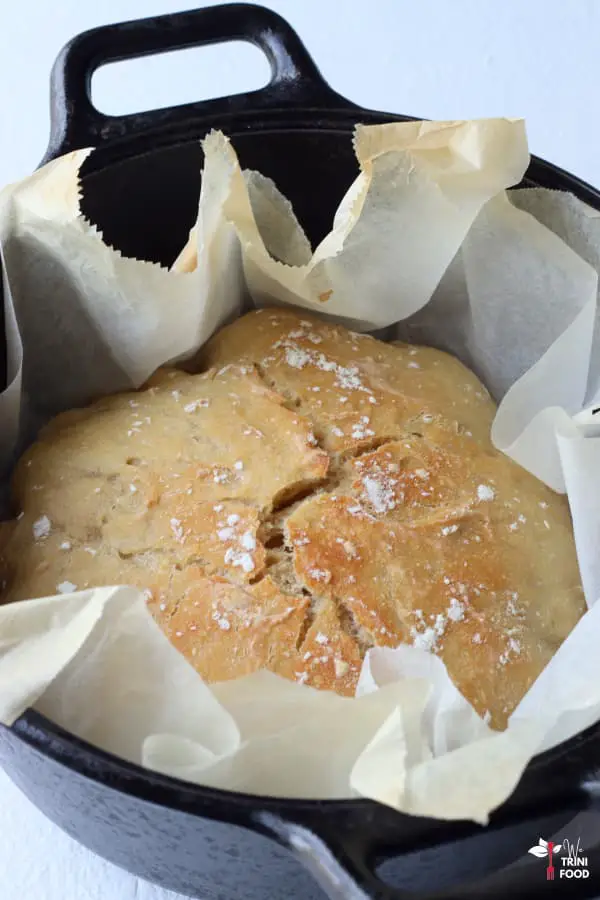
Step 16: Remove from the oven carefully and place the bread on a cooling rack. Steam from the base of the bread will be able to escape and not condensate underneath. Allow the bread to cool down a bit before cutting into it – you can always slice the bread the next day if you like. Serve warm. You can store on the countertop for 1 – 2 days and refrigerate or freeze the rest of the slices for later.
No knead bread recipe
Easy no knead bread
Ingredients
- 400 grams all purpose flour (plus flour to dust the dough)
- 2 tsp salt
- ¼ tsp yeast
- 1½ cups water (maybe up to 1/4 cup more)
Equipment
- Dutch oven with cover
Instructions
Knead
- Sift flour.
- Add dry ingredients to a large bowl. Mix.
- Add water to dry ingredients.
- Stir to form a sticky dough (add ¼ cup more water if the dough is too dry).
- Cover with plastic.
Proof
- Leave on the counter to proof for 6 to 18 hours (12 hours is fine).
- Remove the cover.
- Cut two large sheets of parchment paper (they should fit in the dutch oven with excess on the sides).
- Dust the parchment paper liberally with flour.
- Turn the dough over onto the floured parchment.
- Sprinkle flour on the dough.
- Pull one side of the dough gently over to the other side (using wet or flour-dusted fingers, dough scraper or spatula).
- Repeat pulling of the dough 1 to 2 more times.
- Shape the dough so it will fit in the dutch oven.
- Cover the dough.
- Allow to proof for 2 hours.
Bake
- Place a covered dutch oven in the oven.
- Preheat the oven at 450°F for at least 30 to 45 minutes.
- Remove the dutch oven from the oven when the dough proofing time is over (after the 2 hours).
- Remove the cover.
- Lift the parchment paper up with the dough. Place in the dutch oven.
- Cover the dutch oven.
- Return the covered dutch oven to the oven.
- Bake covered for 20 minutes.
- Remove the cover of the dutch oven.
- Bake uncovered for 10 minutes or until golden brown.
- Remove the bread from the oven.
- Place on a cooling rack.
- Cool before slicing.
- Serve warm.
- Store on the countertop for 2 days. Refrigerate or freeze for later.