How to Make Dhal Trinidad Style
This Trinidad dhal recipe is quick and simple to make, requiring only 7 ingredients. I usually use a pressure cooker and it takes about 10 minutes for the split peas to be fully cooked and appear blended.
Enjoy this dhal with some rice and your favorite curried or stewed sides.
This post contains affiliate links.
Ingredients for dhal Trini style
For this recipe, you will need:
- dhal: also called yellow split peas, channa dal or toor dal. You can find this in the legumes section of the supermarket or pick it up on Amazon here.
- turmeric: this powder adds a slightly earthy taste to the dhal and gives it that beautiful, bright yellow color.
- salt
- water: the more water you use when boiling the split peas, the runnier the dhal will be. With less water, the dhal will be much thicker and may resemble the texture of mashed potatoes.
- oil: any vegetable oil will work for this recipe but my preference is homemade coconut oil.
- whole cumin seeds: also called whole geera seeds. These seeds release their amazing flavor and beneficial compounds when roasted in oil and so add great flavor to the dhal.
- garlic: Like cumin seeds, garlic is also roasted in oil and who doesn’t love the smell and taste of roasted garlic?
- optional ingredients: while this recipe is a simple one, you can add many optional ingredients like chopped onion, pepper, Caribbean green seasoning, cumin powder, fresh herbs like thyme, chadon beni, and even veggies like carrots.
How to make Trinidad dhal
There are two ways to soften yellow split peas:
- boiling until tender – this takes about 40 minutes
- pressure cook the dhal – this takes 10 minutes
Let’s talk about both ways.
Boil dhal until tender
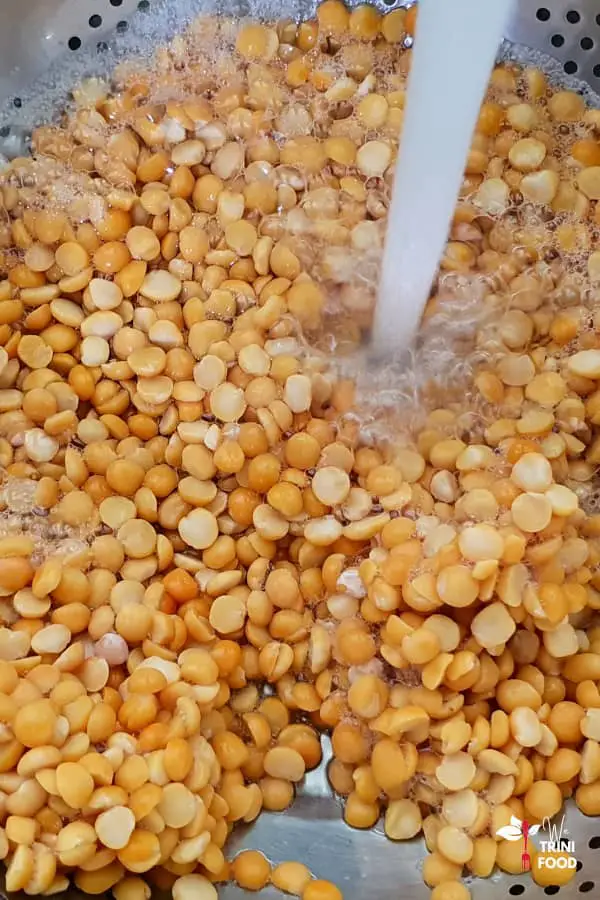
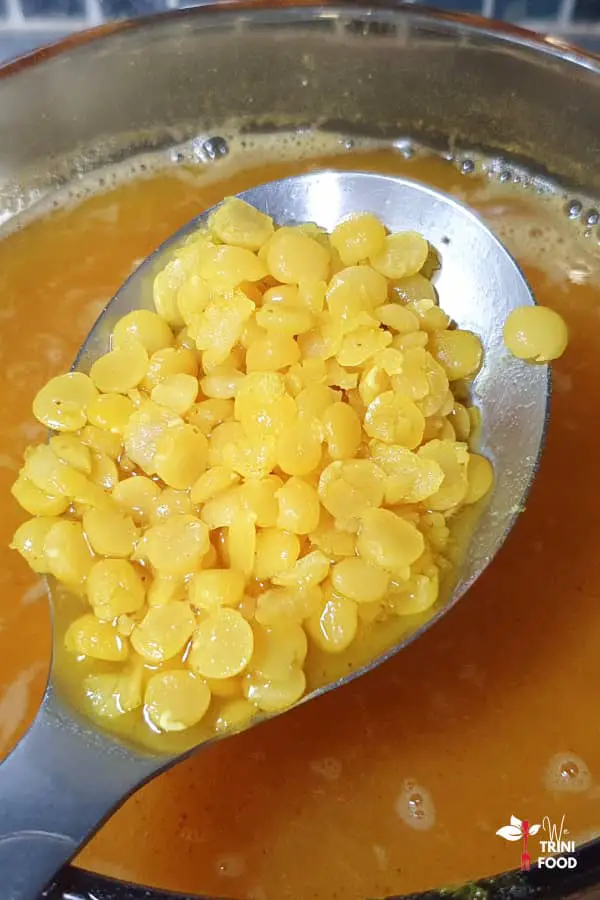
Step 1: Wash the peas thoroughly and add it to a pot of boiling water on medium heat.
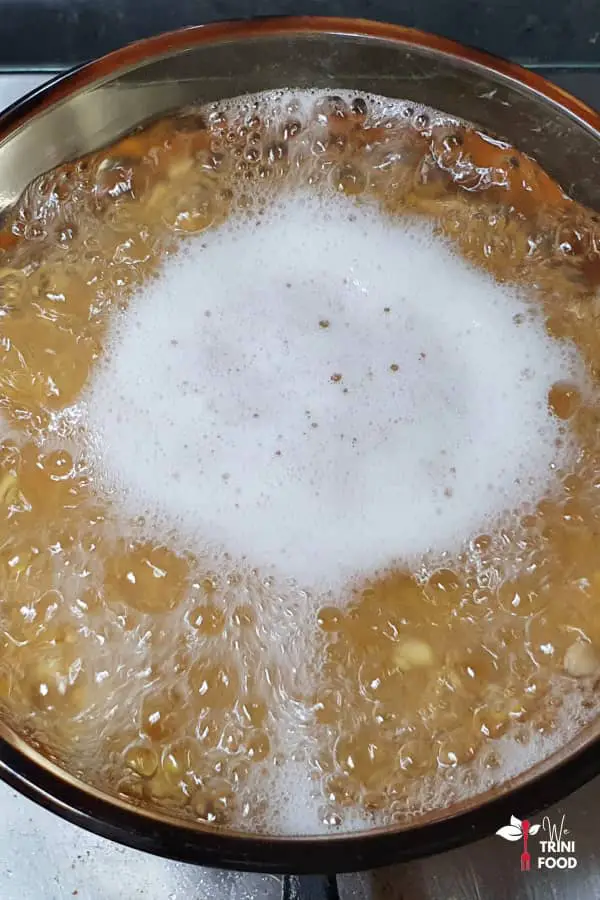
Step 2: Stir to prevent any of the peas from sticking to the bottom. After 5 minutes, you will see froth developing on the water surface. This happens due to the starchy content in the dhal. Skim the froth off and stir again.
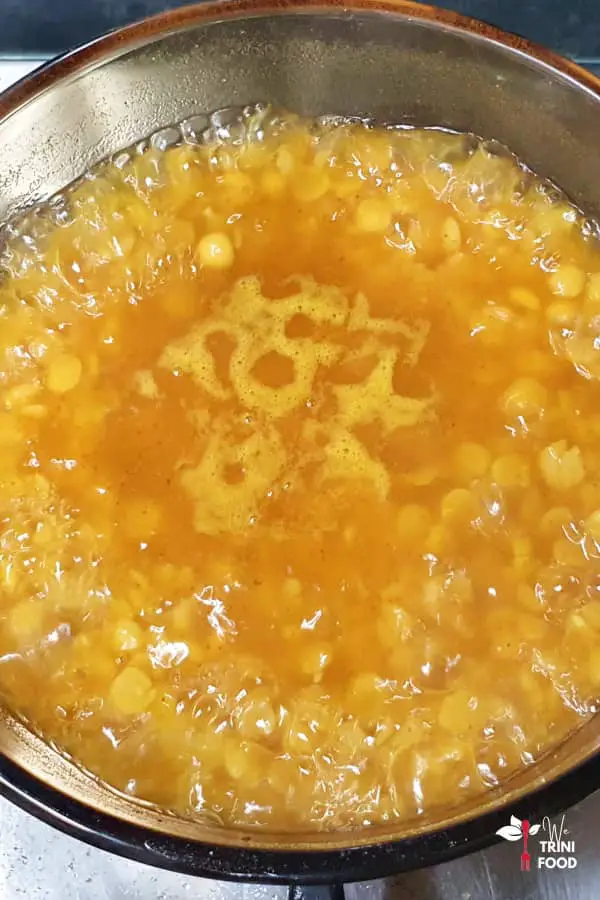
Step 3: Add salt and turmeric and allow to boil until the dhal is completely tender. You should repeat skimming the froth every five minutes or so. And you may need to add more water to the pot – it doesn’t matter if it’s hot or cold water.
Step 4: Anywhere during this time, you can add your other ingredients like onion, carrots, pepper and other seasonings. It’ll take about 30 to 40 minutes for the dhal to soften.
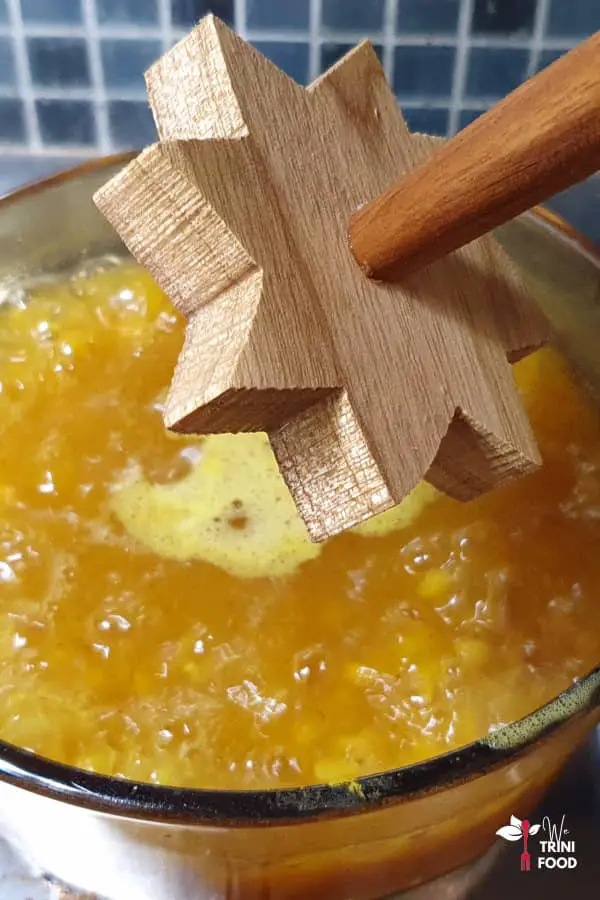
Step 5: Once soft, use a traditional wooden dhal ghotni or immersion blender to blend the dhal.
From here, you can jump to the ‘chunkay’ section.
Or pressure cook dhal
If you want to speed up your cook time, be sure to pressure cook the dhal. Here I’m using my Hawkins pressure cooker – it’s amazing!
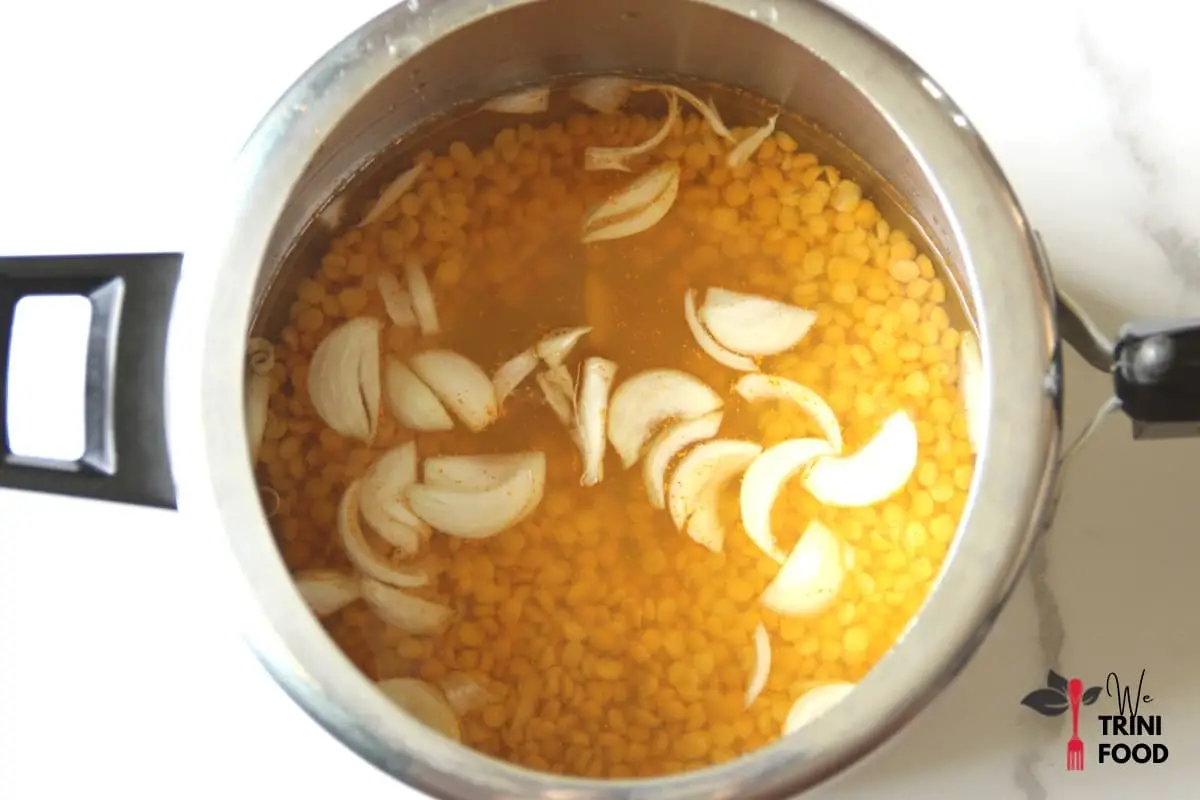
Step 1: Add the water, washed yellow split peas, salt and turmeric to the pressure cooker. If you want to add the additional ingredients like onion, pepper, seasonings and so on, do it at this time.
Step 2: Place the cooker on high heat on a medium stove burner.
Step 3: Cover the cooker and wait until steam starts to spew out of the top. When this happens, place the heavy weight on the lid and turn the heat on low.
Step 4: Leave to cook for 10 minutes.
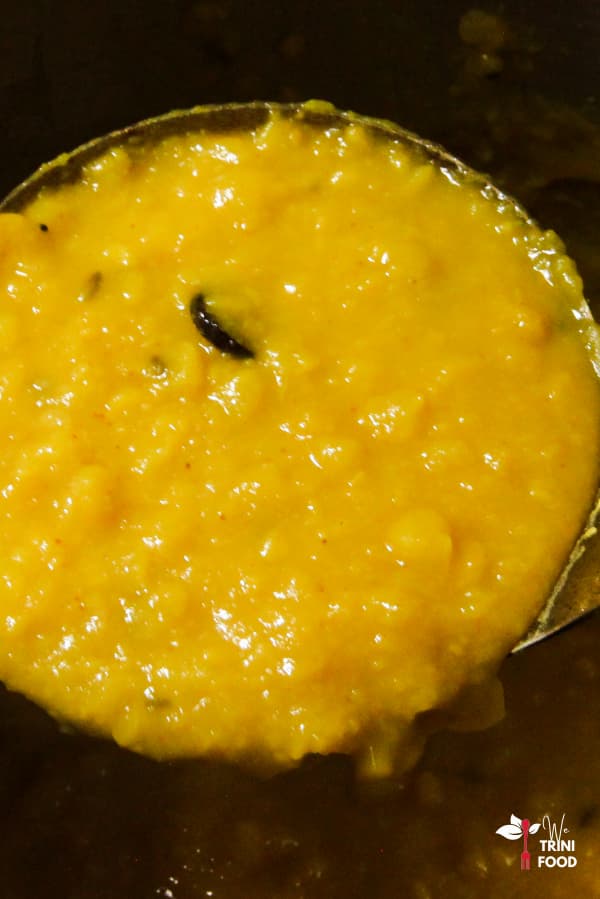
Step 5: Turn the stove off and leave the cooker to depressurize naturally (or place a spoon under the weight to release the steam – don’t get burn!). Once completely depressurized, remove the cover. The dhal should be completely cooked and have an already blended texture.
From here, it’s time to chunkay the dhal.
Chunkay the dhal
What does chunkay mean? Chunkay is an old Hindi word meaning heating oil, spices and garlic and adding it to food.
Step 6: Add sliced garlic and whole geera (cumin) seeds to vegetable oil and cook until the garlic slices turn black or almost black.
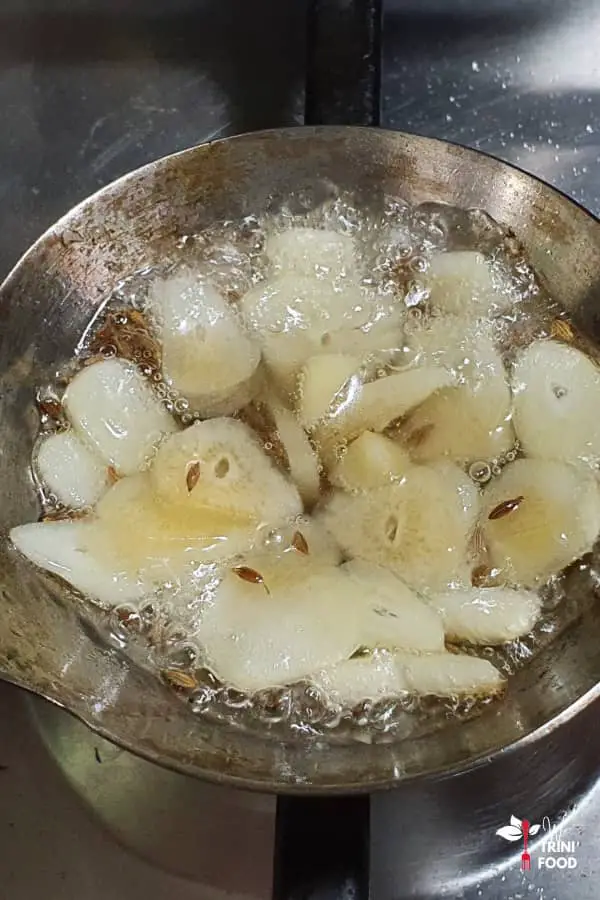
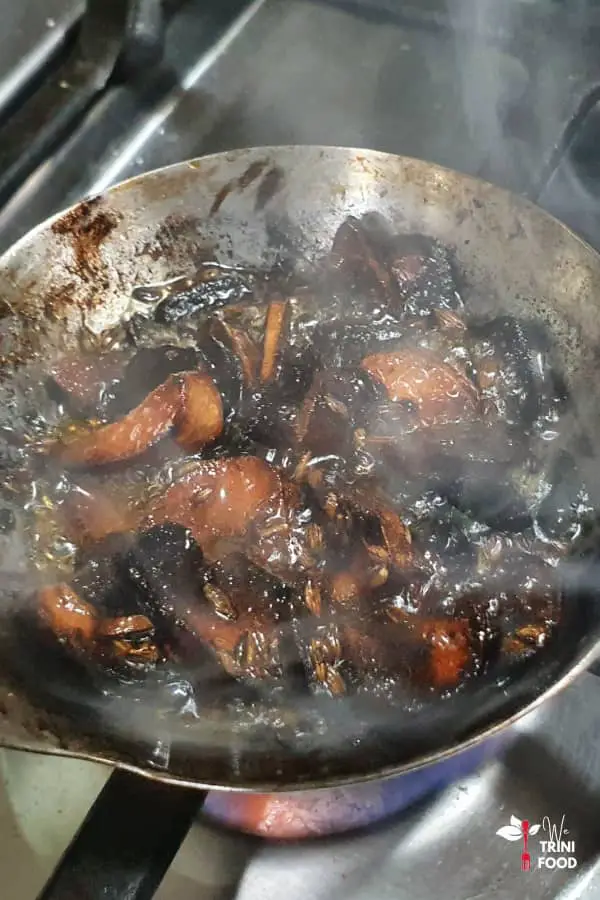
Step 7: Add the hot oil carefully to the dhal. It sputters a lot so be very careful.
I most often use a ladle to heat the oil and, once or twice, the oil has caught fire. It’s often quite small and taking the stove off quickly causes the fire to disappear. But, don’t ever add the ladle with fire to your dhal – it’ll flare up and behave like adding water to a grease fire. If you’re worried about that, use a small pot to heat your garlic slices and geera (cumin).
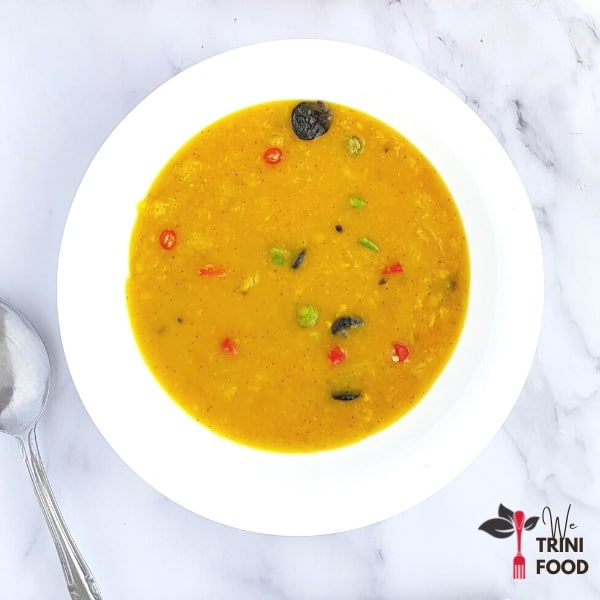
Once the oil is added to the dhal, give it a quick stir. That’s it! Your dhal is done.
As the dhal cools, it’ll become thicker and less runny. If you prefer it a little runny, add more water when boiling or to the pressure cooker.
Here’s a quick video on how I made dhal, rice and fried tomatoes:
What to serve with Trini-style dhal
Dhal and rice is a classic Trini lunch. You can serve it with any vegetable side to create a delicious well-balanced vegan lunch. Or add some curried or stewed meats for a wonderful Indian-inspired meal. Check out are my curry chicken and curry duck recipes too.
Besides a simple salad, vegetarian sides like tomato choka, baigan (eggplant) choka, aloo (potato) choka, curry bodi (long beans) and aloo are great options.
Stew chicken, or stew fish are also tasty pairings with dhal and rice.
Dhal is so versatile.
How healthy is dhal
Per 100 grams of dhal, you will find close to 20% of your daily protein requirement. This makes it a good source of protein for vegans.
The same 100 grams provides over 30% of your required fiber. And there are also low levels (under 10%) of potassium, magnesium and iron.
All nutrition data listed is courtesy the USDA food database.
Dhal recipe

Trini Dhal (with & without pressure cooker)
Ingredients
- 1 cup yellow split peas (dhal)
- 3-6 cups water
- 1 tsp turmeric powder
- 1½ tsp salt
- 2 cloves garlic (sliced)
- 1 tsp whole geera (cumin) seeds
- 1 tbsp vegetable oil
- pepper (optional)
- onion (optional)
- green seasoning (optional)
Equipment
- Pressure cooker (optional)
Instructions
- Wash yellow split peas thoroughly and remove any bad peas.
Without Pressure Cooker (45 minutes)
- Add 3 cups of boiling water to a pot on medium heat.
- Add washed split peas and stir.
- Skim off froth after five minutes.
- Mix in turmeric powder, salt and optional ingredients like onion, pepper, and seasoning.
- Stir occasionally and skim off froth often.
- Add additional 3 cups of water if necessary.
- Cook until the peas are tender.
- Blend the peas (with dhal ghotni or immersion blender).
- Heat oil in a small pot or ladle.
- Add garlic slices and whole cumin to the oil.
- Cook until the garlic slices become black or almost black.
- Pour the heated oil onto the dhal.
- Stir and serve hot.
With Pressure cooker (12 minutes)
- Place pressure cooker on medium burner on high heat.
- Add 3 cups of boiling water, washed split peas, turmeric, salt, and optional ingredients to the cooker.
- Stir.
- Cover the cooker.
- Place weight on the lid when steam escapes through the top.
- Lower the heat and leave to cook for 10 minutes.
- Turn off heat after 10 minutes.
- Depressurize the cooker completely.
- Open the cooker and stir the dhal (if not completely cooked, pressure again, cook for 2 – 3 more minutes and depressurize again).
- Heat oil in a small pot or ladle.
- Add garlic slices and whole cumin to the oil.
- Cook until the garlic slices become black or almost black.
- Pour the heated oil into the pressure cooker.
- Stir and serve hot.
First time ever I made dhal with a pressure cooker and it came out really good. I like to burn my garlic like this too. Appreciate the recipe. Keep going!
I just tried this amazing recipe.
I boiled the dhal for a bit longer and added a little oil to the boiling water. Didn’t need to blend or mash up the dhal because it mashed up sufficiently to my liking when boiled.
The dhal tasted great without the chunkay but once i added it…….. magnificent. I didn’t even finish cook rice yet and hubby shipped off with a bowl of dhal already lol.
Love that!